If you animate a biped for a video game, you have to arrange a series of short discrete actions of the biped one after another in a row on one single timeline. When you export the biped animation, you give each of the actions a start time, an end time and a unique name and then the video game identifies each of the actions by the name to play it. The data is represented so that an action comes after the previous action has finished playing. One action is definitely not along the continuity from the previous one and on to next one even though they are so arranged.
Here is a serious problem with 3ds Max 2011. 3ds Max 2011 doesn't provide you with the method that splits the animation sequence of a biped into discrete actions. When you have finished making a action and freshly start making a new action, you will find that your new keys somehow affect the movement of the previous action. How strange it is! That is because 3ds Max tries to help smooth out your animation between your keys. This is known as interpolation, which has been done for every key of any biped movement in the previous action. So it also smoothes out between the last key of the previous action and the new key of the new action. If the last key of a part of the biped is up front in the previous action, away from the new key of the next new action, things look worse. That's not what you want. You want to stop affecting the previous action.
Unfortunately I couldn't find such an option as no interpolation for biped keys. If it were not for a biped, you could use [Set Tangents to Step] in [Track View-Curve Editor]. Alas, it doesn't work for bipeds. How can you sever the previous action and isolate each action.
I finally came to use two redundant keys which confine the unintentional interpolation between them. Here is how I do it.
-
Let's say you have finished the first action of a biped animation.
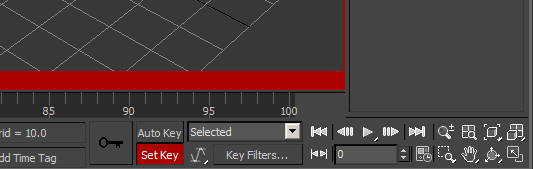
Let's assume you have finished it at frame 50. Move the time slider onto the 50th frame. Make sure you are in [Auto Key] mode.
-
Let's select all the tracks of your biped's Center Of Mass(COM).
Click any part of the biped in one of the viewports. Note those pink rectangles in the right figure. At the top of the right column, click Motion tab to activate Motion panel and find [Track Selection] roll-out on it. Click the fourth button, [Lock COM Keying] with the lock icon on it in the roll-out and you will see it turned into yellow like it is pressed. Click all the three buttons to the left of [Lock COM Keying] button and all the three buttons also turn into yellow.
-
Let's select the whole biped.
Note those red rectangles in the figure below. Open [Schematic View] by clicking [Schematic View(Open)] button, the 5th button from the right of the main toolbar. Find the root node of the biped's tree diagram and double-click it to select all the parts of the whole biped.
-
Let's manually set keys.
Make sure you don't lose the selection. Note those yellow rectangles in the right picture above. Go to to Motion panel and open [Key info] roll-out. Click [Set Key] button, i.e. the first button so as to set the keys over the whole biped.
-
Let's copy all the keys at the finishing frame to the next frame.
Make sure again that the whole biped is still selected. At the bottom of the main window with the viewports, click the collective key at frame 50 on [Track Bar] under [Time Slider] and it will get brighter to indicate it's selected. Press and hold Shift key on your keyboard and meanwhile click and drag the selected key, i.e. the 50th and release your mouse at the very next frame, i.e. 51st. Now the finishing key is copied as shown in the next picture. Note the two black squares at 50, 51 in the next picture.
-
Let's release [Track Selection] buttons.
Back to Motion panel, click the yellow [Lock COM Keying] button to turn it into the previous color and then toggle off the three buttons to the left of [Lock COM Keying] button. All the four buttons should not be yellow.
-
Start working a new action from the second next frame.
Move the time slider onto the second next frame, i.e. the 52nd. Start your new action. The previous action will not be affected at all by the next new action.
Now we can delimit each action of a biped in order to separate them on one single timeline.